Introduction
Beekeeping has become increasingly popular, not just as a hobby but as a vital contribution to environmental sustainability. Using beehive boxes is one of the most effective ways to start your beekeeping journey. This comprehensive guide will walk you through everything you need to know, from what bees and beekeepers need to choosing, setting up, and maintaining your beehive boxes. We will also cover practical guidance and tips for beginners, ensuring a smooth and successful start to your beekeeping adventure.
What Bees and Beekeepers Need
What Bees Need
Bees are essential to our ecosystem and agriculture, and they have specific needs to thrive. Understanding these needs is crucial for anyone starting with beehive boxes. Here, we will discuss the three main requirements: food sources, shelter requirements, and environmental considerations.
Food Sources
Bees primarily need nectar and pollen from flowers. These substances are crucial for their energy and protein requirements.
- Nectar: Bees collect nectar from flowers and convert it into honey, which serves as their primary energy source. When setting up your beehive boxes, ensure that your bees have access to a variety of flowering plants throughout the seasons. This can be achieved by planting a diverse range of flowers that bloom at different times of the year.
- Pollen: Pollen is the bees’ main protein source, essential for brood development. Encourage plants like clover, dandelions, and other native wildflowers around your beehive boxes to provide ample pollen.
- Supplemental Feeding: In times of scarcity, such as early spring or late fall, you might need to provide supplemental feeding. This can include sugar syrup (a mixture of sugar and water) and pollen substitutes, which help ensure the bees have enough food to sustain the colony.
Shelter Requirements
Providing adequate shelter is vital for the health and productivity of your bee colony. Beehive boxes offer a controlled environment for bees to live and work.
- Hive Structure: The hive should have enough space for the bees to build combs, store honey, and rear brood. Langstroth hives, for example, have removable frames that make it easier to manage the hive and inspect the bees.
- Protection from Weather: Place the hive in a location that offers protection from harsh weather conditions. This means ensuring it’s shielded from strong winds and excessive moisture. Elevated platforms can prevent dampness and flooding, while a shaded area can protect the hive from extreme heat.
- Predator Protection: Safeguard your beehive boxes from predators like ants, mice, and wasps. This can include using hive stands with legs placed in containers of oil to deter ants, and reducing hive entrances in the fall to prevent mice from entering.
Environmental Considerations
Bees are highly sensitive to their environment, and certain conditions are necessary for their survival and productivity.
- Clean Air and Water: Bees need clean air free from pollutants and pesticides. Avoid placing hives near heavily trafficked roads or areas where pesticides are regularly used. Additionally, provide a clean water source near the hive. A shallow container with pebbles or floating wood can prevent bees from drowning while they drink.
- Forage Availability: Ensure that there are enough flowering plants within a 2-3 mile radius of your hive. Bees will travel this distance in search of food, and having a variety of plants will ensure they can find what they need throughout the seasons.
- Temperature and Humidity: Bees thrive in moderate temperatures. Extremely hot or cold weather can stress the colony. Insulating your hive in winter and providing ventilation in summer can help maintain an optimal environment inside the beehive boxes.
By ensuring your bees have access to abundant food sources, adequate shelter, and a suitable environment, you can support a healthy and productive bee colony. This foundational knowledge is the first step towards successful beekeeping with beehive boxes.
What Beekeepers Need
To be a successful beekeeper, you need more than just enthusiasm. Having the right equipment, knowledge, and protective gear is crucial. Let’s break down the essentials for any beekeeper: protective clothing, tools and equipment, and knowledge and resources.
Protective Clothing
Safety is paramount when working with bees. Proper protective clothing not only prevents stings but also gives you the confidence to manage your bees effectively.
- Bee Suit: A full bee suit covers your entire body, minimizing the risk of bee stings. Choose a suit made of thick, durable material. Ventilated bee suits are ideal for hot climates as they allow airflow while still protecting you from stings.
- Gloves: Bee gloves protect your hands and wrists. They are usually made of leather or a similar tough material. Some beekeepers prefer using nitrile gloves for better dexterity, though they offer less protection than leather gloves.
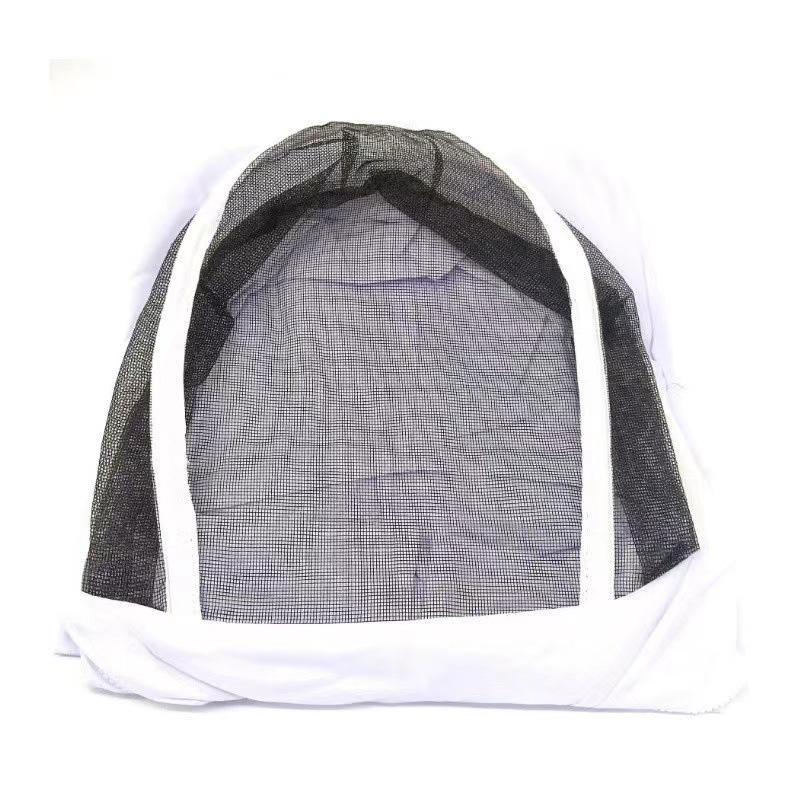
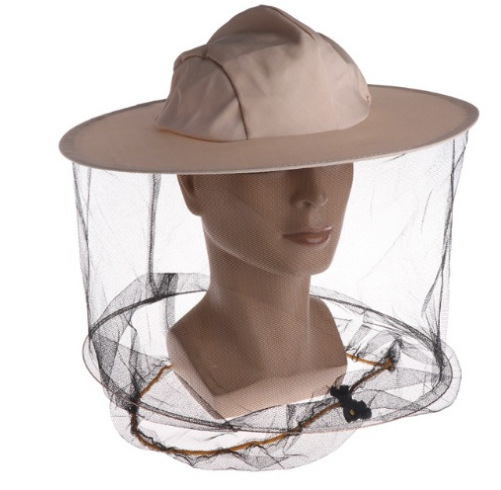
- Veil: Protecting your face and neck is crucial since bee stings in these areas can be particularly painful. A veil attached to the bee suit or a separate veil and hat combination works well. Ensure the veil provides clear visibility and fits securely.
- Footwear: High boots with the bee suit’s legs tucked in prevent bees from crawling up your legs. Leather or rubber boots work well and provide additional protection.


Tools and Equipment
Having the right tools and equipment makes hive management easier and more efficient. Here are some essential items every beekeeper should have:
- Smoker: A smoker calms the bees by masking their alarm pheromones. This tool is invaluable when inspecting the hive. Use natural materials like pine needles, burlap, or untreated wood chips as fuel.
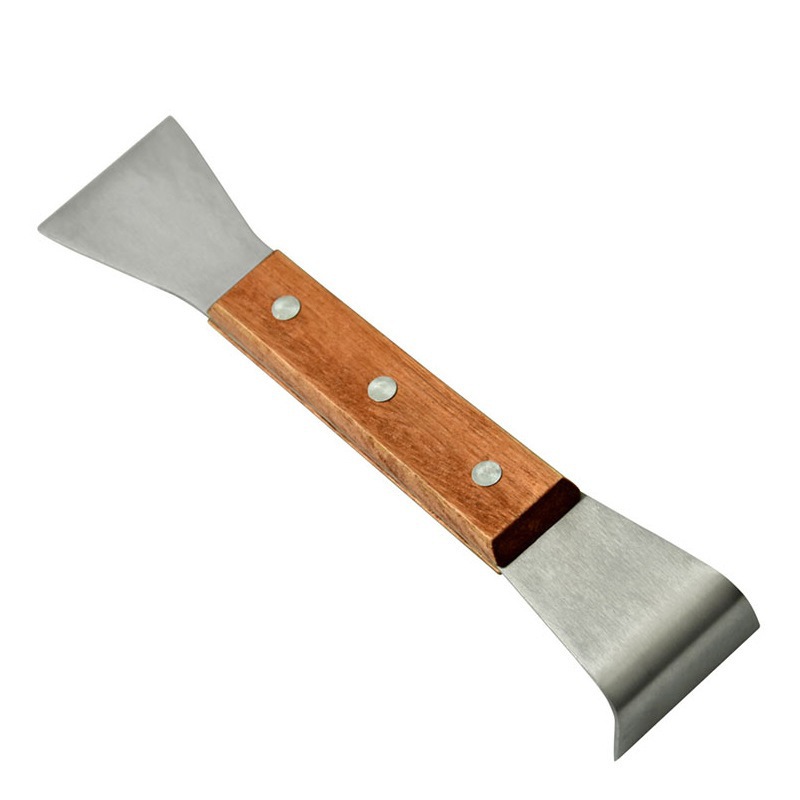
- Hive Tool: A multifunctional tool used to pry apart hive components, scrape off excess wax or propolis, and lift frames. The standard hive tool resembles a small crowbar, while the J-hook hive tool offers additional leverage for lifting frames.
- Bee Brush: A soft-bristled brush used to gently move bees off frames without harming them. It’s useful during inspections and honey harvests when you need to clear bees from specific areas.
- Frame Grip: This tool helps lift frames from the hive without crushing bees. It’s particularly handy for new beekeepers still getting accustomed to handling frames.
- Queen Catcher: A small device used to safely capture and inspect the queen bee. This is useful for tasks like marking or replacing the queen.
- Feeder: Feeders provide supplemental food to the bees, especially during times of scarcity. There are different types of feeders, including top feeders, entrance feeders, and frame feeders, each with its own advantages.


Knowledge and Resources
Knowledge and continuous learning are vital for successful beekeeping. Here are ways to build and expand your beekeeping knowledge:
- Books and Guides: Numerous books cover everything from beginner basics to advanced beekeeping techniques. Some recommended titles include “Beekeeping for Dummies” by Howland Blackiston and “The Backyard Beekeeper” by Kim Flottum.
- Online Courses and Tutorials: Many organizations and universities offer online beekeeping courses. Websites like Coursera, Udemy, and even YouTube have valuable tutorials ranging from hive setup to advanced bee management.
- Local Beekeeping Associations: Joining a local beekeeping association can provide invaluable support and resources. These groups often hold meetings, workshops, and offer mentorship programs for new beekeepers.
- Mentorship: Finding a mentor can significantly accelerate your learning curve. Experienced beekeepers can offer practical advice, troubleshoot problems, and share insights that you might not find in books.
- Forums and Communities: Online forums and social media groups are great for connecting with other beekeepers. Platforms like Reddit (r/beekeeping), Beekeeping Forums, and Facebook groups provide a space to ask questions, share experiences, and stay updated on the latest beekeeping trends.
By equipping yourself with the right protective clothing, tools, and equipment, and continually expanding your knowledge and resources, you’ll be well-prepared to manage your beehive boxes effectively. These elements form the foundation of successful beekeeping, ensuring the health and productivity of your bee colonies.
Choosing and Setting Up Beehive Boxes
Selecting the right beehive box and setting it up correctly are crucial steps in starting your beekeeping journey. Different types of beehive boxes offer various advantages and cater to different management styles. Here, we will discuss the most common types of beehive boxes: Langstroth Hive, Top-Bar Hive, and Warre Hive. We will also include case studies to illustrate their practical use.
Common Types of Beehive Boxes
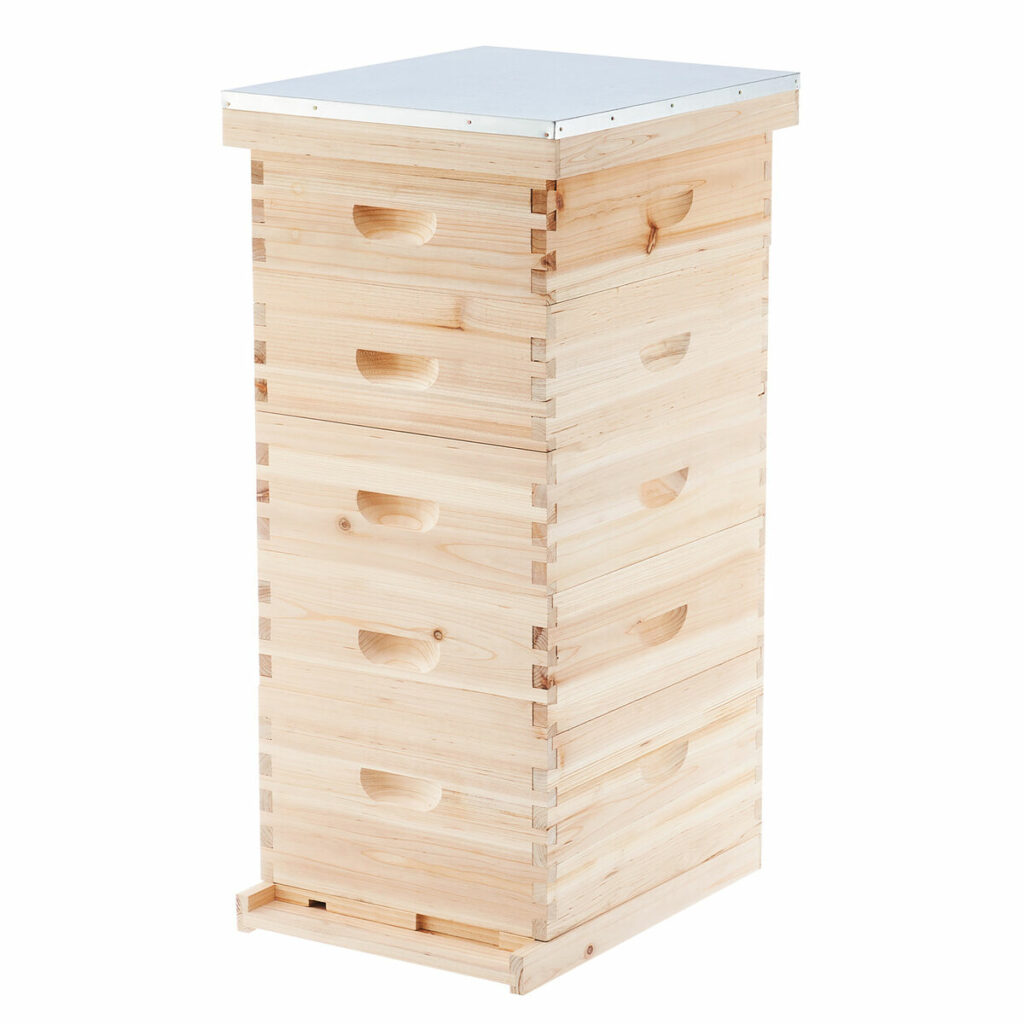
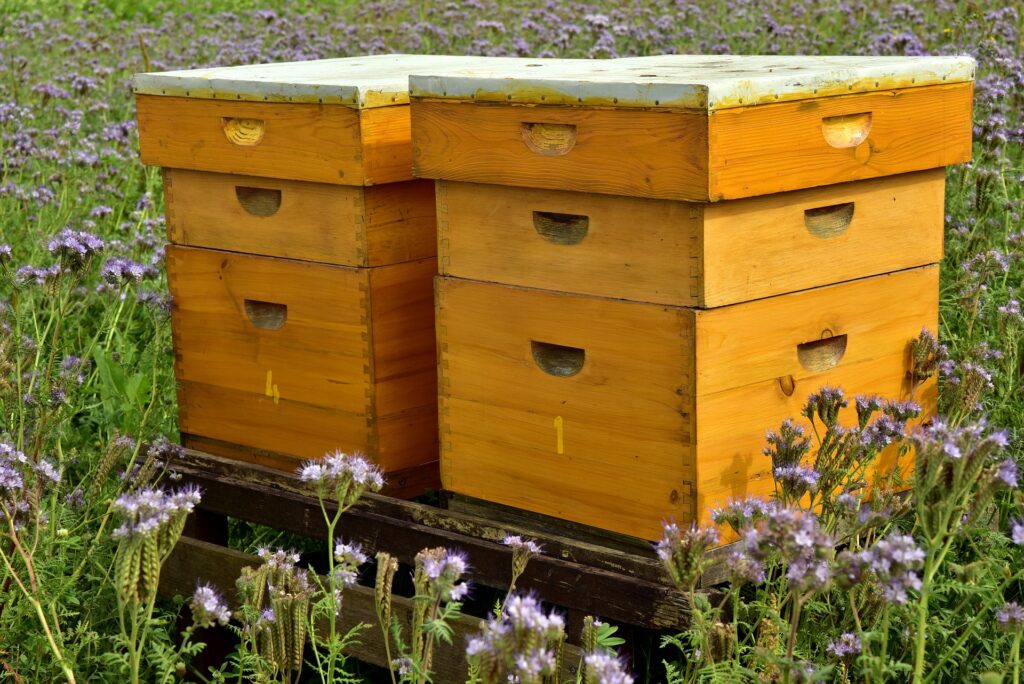
Langstroth Hive
The Langstroth Hive is the most widely used hive in modern beekeeping. Its modular design allows for easy management and scalability, making it popular among both hobbyists and commercial beekeepers.
- Structure: The Langstroth Hive consists of rectangular boxes, called supers, stacked vertically. Each super holds removable frames where bees build their comb.
- Ease of Management: Removable frames allow for easy inspection, honey harvesting, and disease control. The hive’s design also supports the use of queen excluders, which keep the queen out of honey supers.
- Scalability: Adding more supers as the colony grows is straightforward, making it easy to manage the hive’s size and productivity.
- Ventilation and Insulation: The design provides good ventilation, which is crucial for hive health, especially in hot climates. In colder regions, adding insulation to the hive can help protect the bees during winter.

Case Study: A suburban beekeeper using a Langstroth Hive reported that its modular design made it easy to expand the hive as the colony grew. The removable frames allowed for thorough inspections and efficient honey harvesting, contributing to a successful and sustainable beekeeping experience.
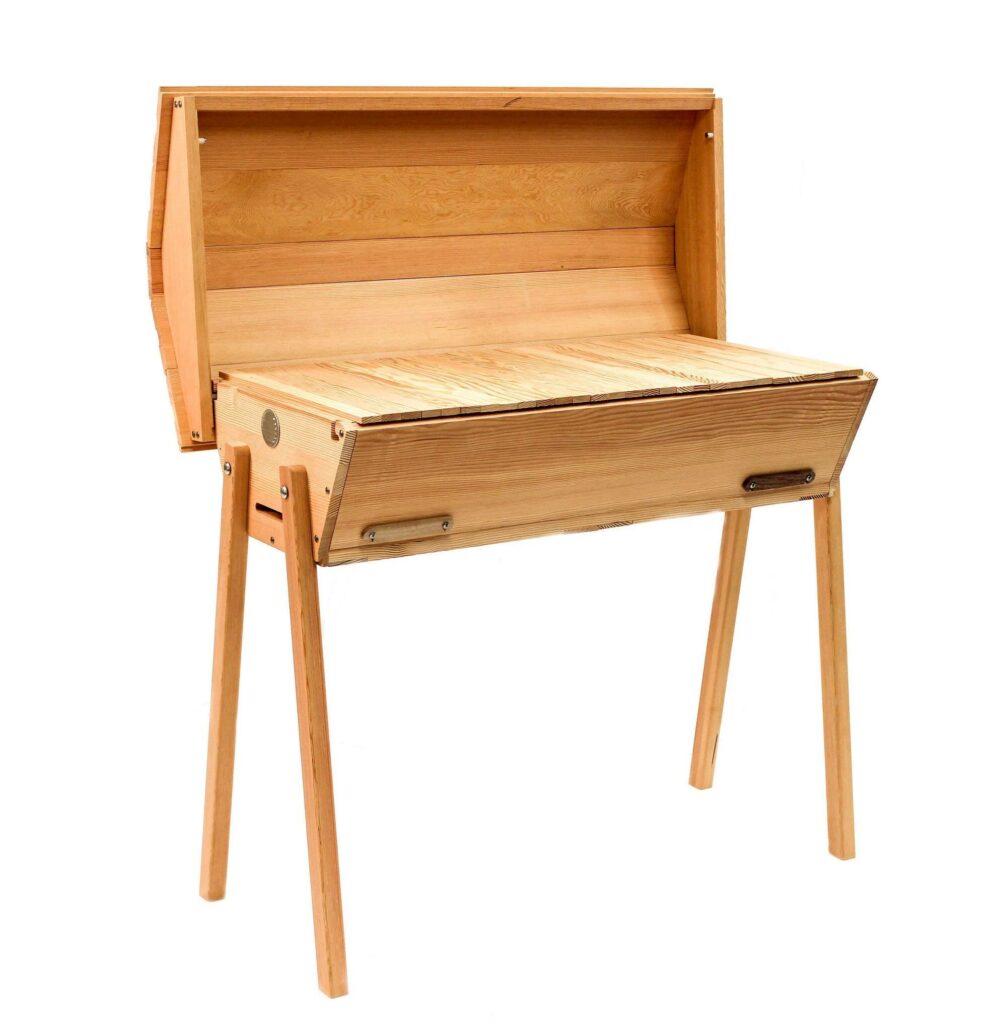
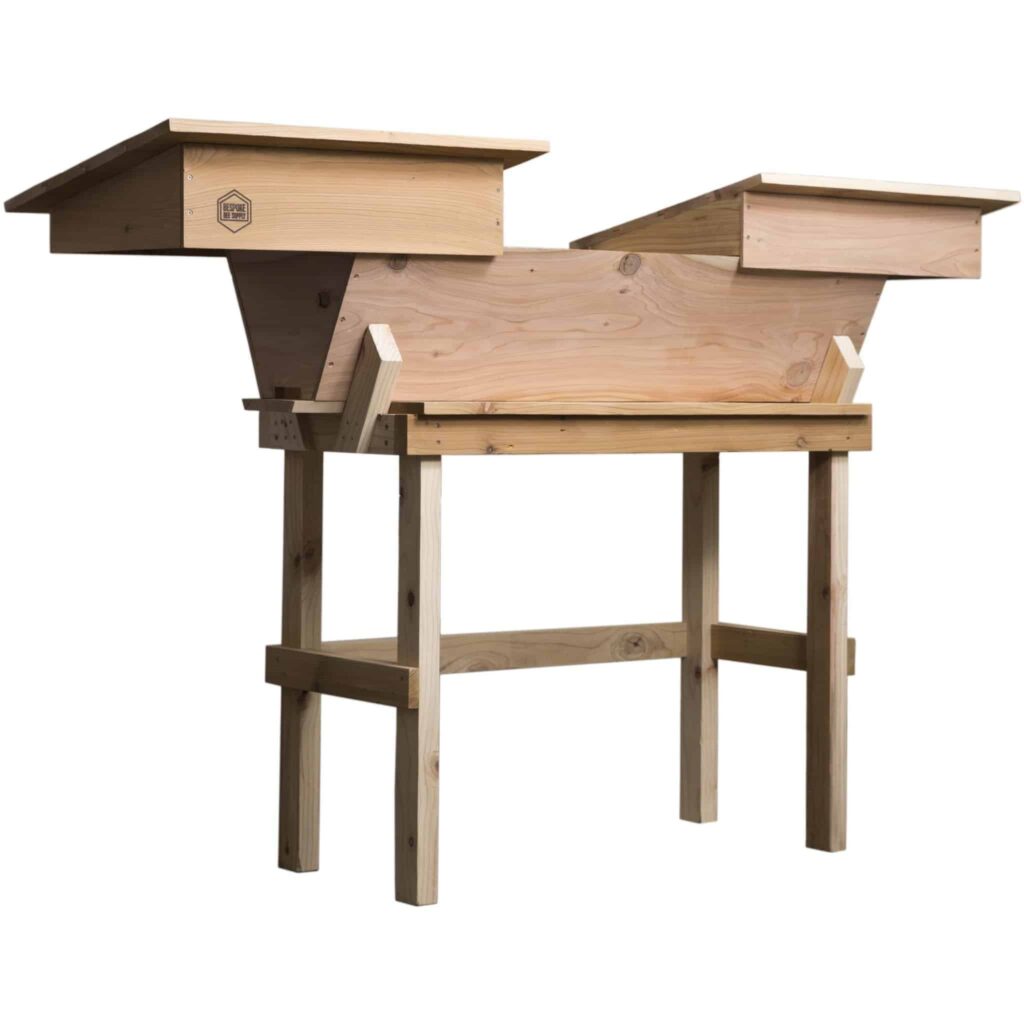
Top-Bar Hive
The Top-Bar Hive is favored by those who prefer a more natural approach to beekeeping. It mimics the bees’ natural way of building comb and requires minimal intervention.
- Structure: The Top-Bar Hive is a horizontal, single-story hive with bars across the top. Bees build their comb down from these bars, creating a more natural comb structure.
- Ease of Use: This hive type is simpler to build and manage, especially for beginners. There are no heavy supers to lift, making it easier on the beekeeper’s back.
- Natural Comb: Bees can build comb according to their instincts, which can lead to healthier bees and better colony development. However, this can also mean more variability in comb shape and size.
- Inspection and Harvesting: Inspections are less invasive as you can remove one bar at a time. Honey harvesting is also straightforward, although it yields less honey compared to the Langstroth Hive.
Case Study: A rural beekeeper opted for a Top-Bar Hive due to its simplicity and alignment with natural beekeeping practices. They found it easier to manage without heavy lifting, and the bees thrived with the ability to build natural comb. However, the beekeeper noted that honey yields were lower than those from Langstroth Hives.
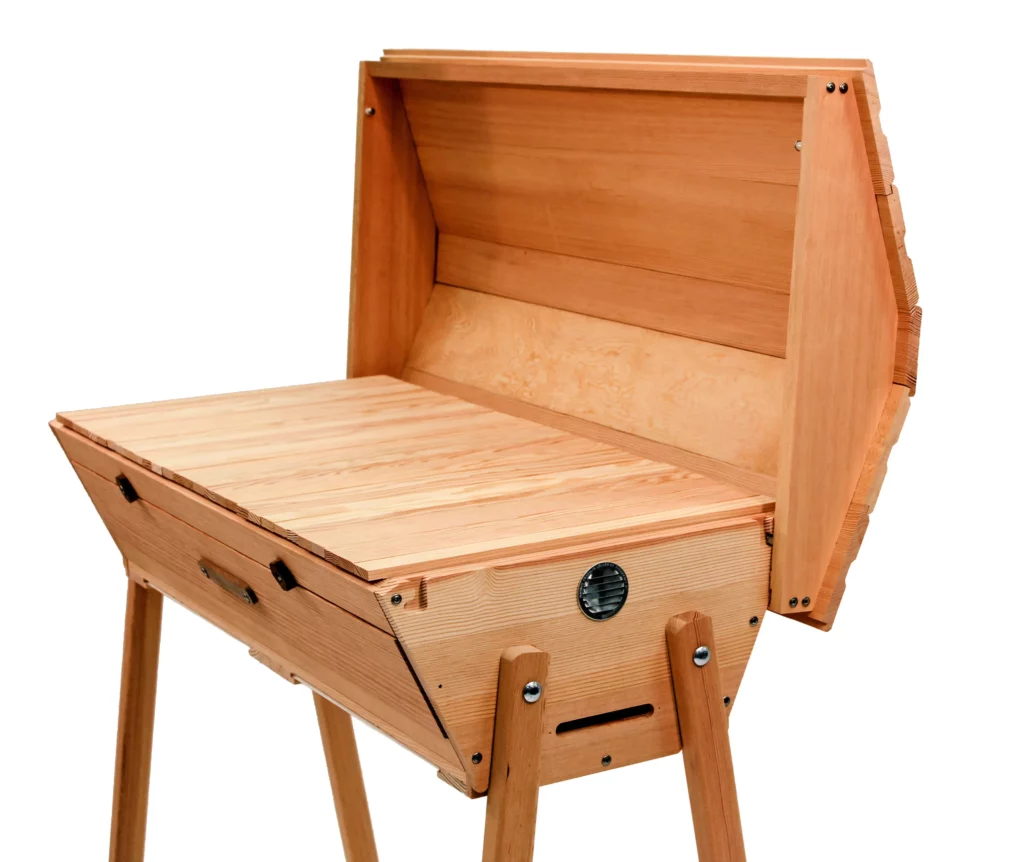
Warre Hive
The Warre Hive, also known as the “People’s Hive,” is designed to mimic the natural nesting environment of bees. It is compact, cost-effective, and requires less frequent intervention.
- Structure: The Warre Hive consists of stacked boxes, similar to the Langstroth Hive, but without removable frames. Bees build comb directly in each box.
- Natural Habitat: This hive type aims to create a more natural environment for the bees, promoting their health and resilience.
- Low Maintenance: The Warre Hive requires less frequent inspections, which can reduce stress on the bees. This makes it an excellent choice for beekeepers who prefer a hands-off approach.
- Harvesting: Honey harvesting involves removing and cutting out a comb from the boxes. This can be more labor-intensive and less efficient than using frames.
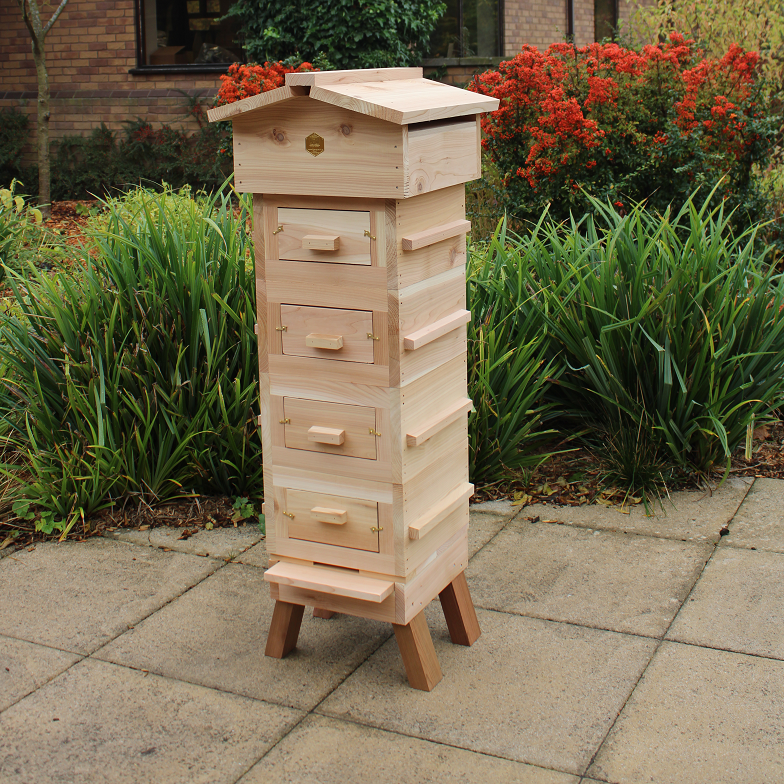
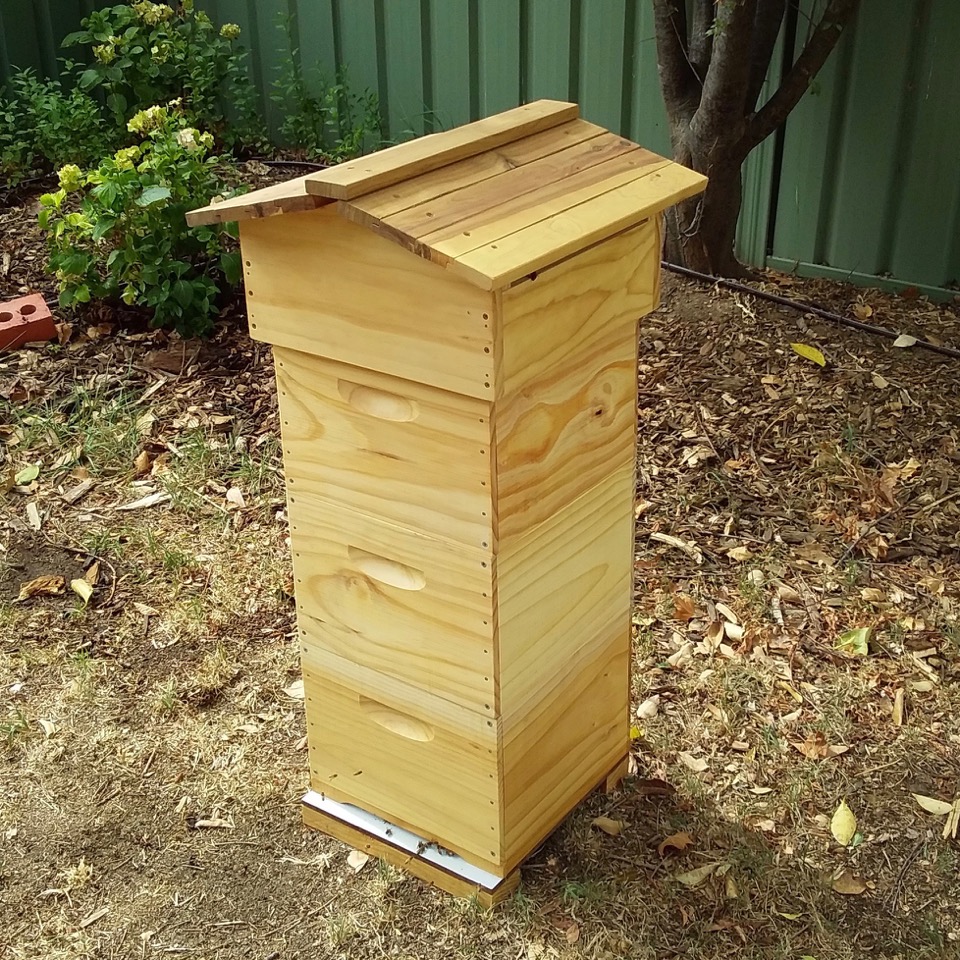
Case Study: An urban beekeeper chose the Warre Hive for its compact size and low-maintenance requirements. The bees appeared healthier, and the hive’s natural design facilitated robust colony growth. However, the beekeeper found honey harvesting more challenging compared to the Langstroth Hive.
Summary Table
| Feature | Langstroth Hive | Top-Bar Hive | Warre Hive |
|---|---|---|---|
| Structure | Modular, vertical stacking with frames | Horizontal, single-story with bars | Stacked boxes, natural comb |
| Ease of Management | High, with removable frames | Simple, minimal lifting | Low maintenance, fewer inspections |
| Scalability | Easily expandable with additional supers | Fixed size, limited expansion | Limited, but manageable |
| Ventilation/Insulation | Good ventilation, customizable insulation | Naturally ventilated | Naturally insulated |
| Honey Yield | High, efficient harvesting | Lower, straightforward harvesting | Moderate, labor-intensive harvesting |
| Ideal For | All beekeepers, especially commercial | Beginners, natural beekeeping enthusiasts | Low-intervention beekeepers |
Choosing the right type of beehive box depends on your beekeeping goals, physical abilities, and management style. By understanding the pros and cons of each type, you can make an informed decision that best suits your needs and ensures the well-being of your bee colony.
Setting Up Beehive Boxes
Setting up your beehive boxes correctly is critical for the health and productivity of your bees. This involves careful site selection, proper assembly of the hive, and thoughtful positioning and orientation. Here’s a detailed guide to ensure your beehive boxes are set up for success.
Site Selection and Preparation
Choosing the right location for your beehive boxes is crucial. The site should meet several key criteria to ensure the bees’ well-being and productivity.
- Sunlight and Shade: Bees thrive in locations that receive morning sunlight, which helps warm up the hive and get the bees active early in the day. However, some afternoon shade can protect the hive from overheating in hotter climates.
- Wind Protection: Place the hive in a spot that is sheltered from strong winds. Natural barriers like trees or shrubs can provide excellent windbreaks.
- Proximity to Water: Bees need water for various activities, including cooling the hive and feeding larvae. Ensure a water source is nearby, such as a shallow birdbath with floating wood or stones for the bees to stand on while they drink.
- Accessibility: The hive should be easy for you to access for regular inspections and maintenance. Avoid placing it in overly remote or difficult-to-reach areas.
- Safety: Place the hive away from high-traffic areas to minimize the risk of bee stings to humans and pets. A quiet, undisturbed spot is ideal.
- Regulations: Check local zoning laws and regulations regarding beekeeping. Ensure you comply with any requirements or restrictions in your area.
Step-by-Step Assembly Guide for Beehive Boxes
Assembling your beehive boxes properly is essential to ensure the safety and productivity of your bee colony. Here is a detailed step-by-step guide to help you through the process.
Gather Materials for Beehive Boxes
Before you start assembling your beehive boxes, make sure you have all the necessary components and tools. This will make the assembly process smoother and more efficient.
- Hive Components:
- Bottom board
- Hive body (deep super)
- Frames with foundation
- Inner cover
- Outer cover
- Entrance reducer
- Tools:
- Hammer or screwdriver
- Nails or screws
- Level
- Carpenter’s square
Check that all the parts are in good condition and free from defects. Having everything ready and in good shape will save time and prevent any interruptions during assembly.
Assemble the Bottom Board of Beehive Boxes
The bottom board forms the foundation of your beehive. It supports the weight of the hive and provides the entrance for the bees.
- Positioning: Place the bottom board on a flat, level surface. Use a level to ensure it is perfectly horizontal.
- Secure the Base: If the bottom board comes in separate parts, secure them together with nails or screws. Ensure it is sturdy and stable, as this will support the entire hive.
The bottom board should be raised off the ground slightly to prevent moisture buildup and provide ventilation. Use cinder blocks or a hive stand for this purpose.
Build the Hive Body of Beehive Boxes
The hive body, or deep super, is where the bees will live and work. Proper assembly of this component is crucial for the hive’s overall stability and functionality.
- Attach the Panels: Begin by attaching the side panels to the front and back panels. Use nails or screws to secure the joints firmly.
- Ensure Squareness: Use a carpenter’s square to check that the corners are at right angles. A square hive body ensures that the frames fit properly and that the bees can build their comb straight.
- Reinforce the Joints: For added strength, you can use wood glue at the joints before nailing or screwing them together. This helps prevent any gaps that could weaken the structure.
Once the hive body is assembled, double-check all the joints and ensure there are no gaps or misalignments.
Install the Frames in Beehive Boxes
Frames are critical as they hold the foundation where bees will build their comb. Proper installation ensures the bees can work efficiently and the combs remain intact.
- Prepare the Frames: Assemble the frames if they are not pre-assembled. This usually involves attaching the top bar, bottom bar, and side bars together.
- Add the Foundation: Insert the foundation into each frame. This can be wax foundation or plastic foundation, depending on your preference. Secure the foundation with frame pins or clips if necessary.
- Place Frames in the Hive Body: Insert the frames into the hive body, ensuring they are evenly spaced. There should be a uniform gap between each frame to allow bees to move freely.
Frames should hang securely within the hive body without touching the bottom board. This setup prevents the comb from being built too close to the hive floor.
Add the Inner Cover to Beehive Boxes
The inner cover provides insulation and ventilation, essential for maintaining a stable environment inside the hive.
- Placement: Place the inner cover directly on top of the hive body. Ensure it fits snugly without leaving any gaps.
- Ventilation Hole: Ensure the ventilation hole in the inner cover is unobstructed. This hole helps regulate temperature and moisture within the hive.
The inner cover also prevents bees from attaching a comb to the outer cover, making inspections and maintenance easier.
Place the Outer Cover on the Beehive Boxes
The outer cover protects the hive from weather elements such as rain, wind, and sun. It should be sturdy and weather-resistant.
- Fit the Outer Cover: Place the outer cover on top of the inner cover. Ensure it fits well and covers the hive body completely.
- Secure the Cover: If your area experiences strong winds, consider securing the outer cover with a weight or hive strap to prevent it from blowing off.
A properly fitted outer cover helps maintain the internal environment of the hive and protects the bees from external threats.
Install the Entrance Reducer in Beehive Boxes
The entrance reducer controls the size of the hive entrance. This is particularly useful for managing ventilation and preventing pest invasions.
- Position the Reducer: Place the entrance reducer in the hive entrance. It should fit snugly without any gaps.
- Adjust According to Season: During colder months, use the smaller entrance to retain heat. In warmer months, the larger entrance helps with ventilation.
The entrance reducer also helps manage bee traffic and protect the hive from intruders like mice and other pests.
Positioning and Orientation Tips
The positioning and orientation of your beehive boxes can significantly impact the colony’s health and productivity.
- Entrance Direction: The hive entrance should face southeast to catch the morning sun. This helps to wake the bees early and get them foraging sooner.
- Elevation: Elevate the hive off the ground using a stand or cinder blocks. This prevents moisture from seeping into the hive and deters pests like ants and rodents.
- Spacing Between Hives: If you have multiple hives, space them at least 3-4 feet apart to prevent bees from drifting between hives and to reduce the spread of diseases.
- Level Ground: Ensure the hive is on level ground to prevent tipping and to make inspections easier.
- Ventilation: Ensure there is adequate airflow around the hive to prevent overheating in the summer and moisture buildup in the winter. This can be achieved by positioning the hive in an open area with good air circulation.
- Orientation: Tilt the hive slightly forward to allow rainwater to drain out of the entrance. This helps keep the hive dry and prevents water from accumulating inside.
Starting Your Beehive Boxes
Starting your beekeeping journey with beehive boxes requires careful planning and preparation. From assessing your readiness to obtaining bees, each step is crucial for ensuring a successful and sustainable beekeeping experience. Here’s a comprehensive guide to help you get started.
Questions to Answer First Before Starting Your Beehive Boxes
Before diving into beekeeping, it’s essential to evaluate your readiness and understand the requirements. Answering these questions will help you make informed decisions and set realistic expectations.
Assessing Your Readiness
- Time Commitment: Beekeeping requires regular attention. Are you prepared to spend time on inspections, maintenance, and learning? A typical hive needs inspection every 7-10 days during the active season.
- Physical Ability: Managing a hive involves lifting heavy boxes and standing for extended periods. Ensure you are physically capable of these tasks or have someone who can assist you.
- Knowledge and Skills: Do you have basic knowledge of bee biology and hive management? Consider taking a beginner’s course or reading books on beekeeping to build a solid foundation.
- Support System: Having a mentor or joining a local beekeeping group can provide invaluable support and advice. Networking with experienced beekeepers can help you navigate challenges more effectively.
Local Regulations and Permits
- Zoning Laws: Check local zoning laws and regulations regarding beekeeping. Some areas have restrictions on the number of hives or require a minimum distance from property lines.
- Permits: Some regions require beekeepers to obtain permits or register their hives. Contact your local agricultural extension office or beekeeping association for specific requirements.
- Neighborhood Considerations: Inform your neighbors about your beekeeping plans. Address any concerns they may have about safety and bee activity, and assure them of the benefits of having pollinators in the area.
Seasonal Considerations
- Best Time to Start: The optimal time to start a new hive is in early spring when bees are most active and have ample time to build up their colony before winter.
- Weather Conditions: Ensure the weather is mild enough for bees to forage and establish their hive. Extreme cold or heat can stress the colony and hinder their development.
- Forage Availability: Assess the availability of flowering plants in your area. A diverse and continuous supply of nectar and pollen is crucial for the bees’ nutrition and productivity.
Installing Your Beehive Boxes
Proper installation of your beehive boxes sets the stage for a healthy and productive bee colony. Follow these steps to ensure a smooth and successful setup.
Initial Setup Process
- Site Preparation: Clear the area of weeds and debris. Ensure the site meets the criteria discussed earlier (sunlight, wind protection, water source, etc.).
- Positioning the Hive: Place the hive stand or cinder blocks in the chosen location. Ensure it is level and stable.
- Assembling the Hive: Follow the step-by-step assembly guide to build your beehive boxes. Double-check that all components are securely attached and the hive is stable.
Tips for a Smooth Installation
- Timing: Install the hive during mild weather conditions, preferably in the morning when bees are less active.
- Calm Environment: Work calmly and quietly to avoid agitating the bees. Wear your protective clothing to prevent stings.
- Hive Orientation: Ensure the hive entrance faces southeast to catch the morning sun and provide optimal foraging conditions.
- Inspection Checklist: Before installing the bees, double-check that all components are correctly assembled, and the hive is ready to accommodate the bees.
Obtaining Bees for Beehive Boxes
Sourcing healthy bees and introducing them correctly to your beehive boxes is vital steps in establishing a thriving colony. Here’s how to go about it.
Where to Source Bees
- Local Beekeepers: Purchasing bees from local beekeepers can be advantageous as these bees are already adapted to the local environment. Local associations often have directories of reputable suppliers.
- Online Suppliers: Several online suppliers offer bees for sale. Ensure they are reputable and provide healthy, disease-free bees. Consider reviews and recommendations from other beekeepers.
- Nucleus Hives (Nucs): A nucleus hive is a small, established colony with a queen, workers, brood, and honey. This option provides a head start as the bees are already familiar with each other and the queen.
Methods of Introducing Bees to the Hive
- Package Bees: A common method for beginners. Package bees comes in a screened box containing a queen in a separate cage and a few thousand worker bees. To install, gently shake the bees into the hive body and place the queen cage between the frames.
- Nucleus Hives (Nucs): Transfer the frames from the nuc box into your hive body, maintaining the same order. This method is less stressful for the bees as they are already accustomed to the queen and the frames.
Conclusion
Embarking on a journey of beekeeping with beehive boxes can be incredibly rewarding. With the right knowledge, tools, and dedication, you can support a thriving bee colony and contribute to environmental sustainability. For aspiring beekeepers, remember to start small, stay patient, and continuously learn.